Wednesday, February 13, 2013

Hand Dessert- Brown Sugar Scrub and Whipped Coco-Cacao Butter Cream


Since starting my detox a couple weeks ago, I've eliminated almost everything processed and synthetic, and decided to make my own beauty products! The aroma of these products satisfy your sweet-tooth while leaving your hands smooth and supple all day long!


Brown Sugar Hand Scrub

2 cups raw brown sugar
2 cups coconut sugar
1/4 cup sweet almond oil
1/4 cup castor oil
1/4 cup coconut oil

Combine sugars together in a medium bowl with a fork to break up lumps. Melt coconut oil in a glass jar in microwave and combine with other oils. Add to sugar mixture with a fork. Pour into glass jar.
Use a tablespoon amount on both hands, scrubbing for approximately one minute before rinsing with warm water. Follow with Coco-Cacao Butter Cream once to twice a week.


Whipped Coco-Cacao Butter Cream

2 cups coconut oil, softened
1/4 cup cacao butter, melted
1/4 cup castor oil
1/4 cup sweet almond oil


Whip coconut oil in a mixer at high speed until light and fluffy. Combine cacao butter, castor oil and almond oil in a measuring cup with a spout. Slowly add to coconut oil and whip for 10 minutes. Mixture will resemble meringue. Pour into glass jar. Use as needed.

Thursday, December 13, 2012

Protein Bar Cookies

 
Packed with protein, Omega-3 and 6, fiber and anti-inflammatory spices, these cookies are also low-glycemic, dairy-free, gluten-free, egg-free and contain no cholesterol or trans-fats. Perfect for a 3 o'clock snack!
 
Ingredients
 
1 tbsp ground flax seeds
30 ml water
½ cup flaxseed oil
½ cup organic raw blue agave nectar
2 tbsp organic coconut milk
½ cup buckwheat flour
½ cup quinoa flour
½ cup chickpea (garbanzo bean) flour
½ cup unsweetened shredded coconut
2 tsp ground cinnamon
1 tsp ground cardamom
½ tsp sea salt
½ tsp baking soda (alum-free)
2 cups gluten free oats
1 cup walnuts, roughly chopped
½ cup Enjoy Life dark chocolate, roughly chopped
 
Preheat oven to 350 F. Line 2 cookie sheets with parchment paper.  Combine flax with water and allow to stand 5-10 minutes to thicken.Mix oil and agave in a large mixing bowl.  Add flax mixture and coconut milk. Beat well. Stir together flours, spices, salt and baking soda. Add dry mixture to wet, blending well. Add oats, walnuts and chocolate. Chill ½ hour for easier handling. Roll into 2-3” cookies and space 1.5” apart on cookie sheets. Bake 12-15 minutes or until just done. Cool on wire rack. Makes 18
 
Nutrition facts (per cookie):  
Calories: 262, Fat: 16 g, Sat. Fat: 4 g, Sodium: 100 mg,  Carbohydrates: 27 g, Fiber: 3 g, Sugar: 11 g, Protein: 5 g, Omega-3: 4g, Omega-6: 3 g


Tuesday, March 20, 2012

Gelato al Mascarpone Affogato


In celebration of the first day of spring, in which actually feels like the first day of summer, I wanted to make a frozen variation of my favorite dessert, tiramisu! Rich mascarpone gelato is dusted with cocoa powder then a shot of espresso poured over top and served with Savoiardi.

Ingredients

1 cup 35% cream
1 cup whole milk
4 egg yolks
1/2 cup granulated sugar
1 vanilla bean, slit lengthwise and seeds
500 gr. mascarpone
Cocoa Powder
Espresso
Savoiardi

To make the gelato, Scrape seeds from vanilla bean and add along with bean to cream in a saucepan. Bring cream to boil, then heat to low and allow vanilla to infuse for 5 minutes.
Discard bean. In meantime, beat egg yolks with sugar with wire wisk until sugar is dissolved.
Whisk in milk. Pour half cream mixture into egg mixture to temper eggs, then pour egg mixture back in saucepan with cream and heat at medium low for 5-6 minutes, or until thick enough to coat the back of wooden spoon. Do not allow mixture to boil.
Strain in fine sieve in bowl and put in water bath for about 1/2 hour, stiring occasionally.
When custard is cooled, cover with plastic wrap pressing on top of so to prevent skin from developping.
Chill in refrigerator for at least 3 hours or overnight.
Combine custard with mascarpone with wire wisk until homogeneous.
Pour in ice cream machine and follow directions.
Freeze for at least 3 hours before serving.

Put one or two scoops of gelato in serving bowl. You will need to allow gelato to set at room temperature for about 10 minutes before scooping as it is very dense. Dust with cocoa powder and pour over a shot of hot espresso. Serve with one or two Savoiardi.

Tuesday, December 6, 2011

Cook for the Cure Annual Pink Party!

This past Sunday I hosted a party to raise money (and awareness) for the CBCF (Canadian Breast Cancer Foundation). With the help of my dear friends, we raised $300! I had a buffet style dinner around my kitchen island and set up the dining room with pink tableware. The menu was as follows:

Appetizers:
Crab Cakes with Red Pepper Tapenade
Smoked Salmon Cream Cheese Ball rolled in chopped walnuts and pink peppercorns
Baked Brie with Cranberries in phyllo dough
Nachos with Pink Salsa (salsa and sour cream)

Main:
Quinoa Tabouli salad with pomegranates
Penne alla Vodka
Rainbow Trout
Roasted Garlic Couscous

Dessert:
Strawberry Cupcakes with Pink Ribbon white chocolate toppers
Pecan Balls rolled in pink icing sugar
Pizzelle dusted with pink icing sugar
Pink Popcorn

Beverages:
Cream Soda
Raspberry Gingerale
Rose Wine (White Zifandel)
Pink Chambord Vodka
Cranberry Juice
Cosmos

I then taught the girls to make gingerbread cookies and royal icing which we coloured pink. Pics are below. I look forward to next year's event to be bigger and better!


Sunday, November 13, 2011

Recipe of the week: Zuccotto


Zuccotto is a typical dessert from Florence. The shape of the cake is said to resemble the dome of Florence's famous church, il Duomo.

Ingredients

12" round sponge cake layer
1/4 cup Brandy
1/4 cup Amaretto or Frangelico
120 gr. almonds
120 gr. hazelnuts
180 gr. dark chocolate
600 ml whipping cream
1/2 cup icing sugar

Toast almonds and hazelnuts under broiler for 5 minutes. Allow to cool before roughly chopping.
Cut cake is slices 1/2" thick on the diagonal, in triangular shapes. Combine liqueurs and brush one side of each section of cake with mixture. place sections of cake, unbrushed side against sides of tin, against the inside of a 10-cup capacity round-based bowl which as been lined with a layer of plastic wrap (leaving 5" overhang all around), with the narrowest end of cake on the bottom. Alternate crust and not-crust sides of cake to give striped effect. Fill the gaps with pieces of moistened cake. Trim edges of cake so they are level with the top of the bowl.
Chop 60 gr. of dark chocolate and melt remaining chocolate in microwave, at 20 second intervals until completely melted. Whip together cream and icing sugar until stiff then fold in nuts. Divide mixture in half. Fold chopped chocolate in one half and melted chocolate in other half.
Spoon white cream mixture evenly over entire cake surface, leaving a cavity in the center of the bowl. Fill in cavity with chocolate mixture. Moisten remaining cake with liqueur and arrange on top to cover surface completely.
Wrap bottom with overhanging plastic wrap and chill overnight. Invert over serving plate and dust top with combined sifted icing sugar and cocoa powder.

Tuesday, November 8, 2011

Banana Bread

I always end up having over ripe bananas since I'm the only one in my family who eats bananas, which I then turn into banana bread! I end up sometimes making 2 loaves which I bring one to work and keep one at home...both lasting no more than a day!

Ingredients

3 ripe bananas, mashed with a fork or masher
3/4 cups brown sugar, firmly packed
2 eggs, room temperature
1/2 cup canola oil
1 tsp vanilla extract
2 cups all purpose flour
1 tsp baking soda
1/4 tsp salt
1 cup chocolate chips or chopped walnuts

Preheat oven to 350 F. Grease and flour loaf pan. Beat together sugar and oil. Add eggs one at a time then vanilla. Fold in mashed bananas. Whisk together remaining ingredients except chocolate chips or nuts in a separate bowl, then add to wet mixture just until combined. Gently fold in chocolate chips or nuts. Bake for 1 hour and allow to cool for 10 minutes in pan before inverting onto cooling rack.

Wednesday, November 2, 2011

Easy Peasy Key Lime Pie

I'm typically not a fan of fruity desserts, but the tartness of key limes perfectly balances the sweetness in this pie. Be sure to use key limes and not regular limes for a more aromatic pie. This recipe yields a very light, airy pie as it doesn't call for eggs which tends to make the pie more dense. The combination of the lime juice with the condensed milk is what causes the mixture to thicken, thus requiring very little baking.


Ingredients:


9" prebaked graham pie crust
2 cans sweetened condensed milk 
1/2 cup sour cream
3/4 cups key lime juice (from about 20 limes)
1 tbsp grated lime zest

Preheat oven to 350 F. Beat together condensed milk, sour cream, key lime juice and zest in a large bowl with paddle attachment for 5 minutes, until thoroughly combined. Pour into prepared pie crust and bake for 8-10 minutes, until bubbles on the surface burst. Do not brown. Allow to cool completely and refrigerate for a least 2 hours before serving with whipped cream.

Sunday, October 30, 2011

Itsy Bitsy Creepy Crawly Cupcakes


Adapted from Martha Stewart, these bite-sized cupcakes are actually cinnamon-flavoured Red Velvet cakes with cream cheese icing. Makes insect eating a lot more palatable!

Ingredients:

1 recipe Red Velvet cake (store bought or homemade)
1 tsp Cinnamon flavour
Cream Cheese icing (store bought or homemade)
Black sanding sugar
Black liquorice strings, cut in 2 1/2 inches
Small red candies or red coated chocolate sprinkles
Mini marshmallows, cut in small cone shapes


Prepare cake mix adding cinnamon flavour. Bake in min muffin pans with black liners. After completely cooled, frost with cream cheese frosting and dip in black sanding sugar. Add 8 pieces of liquorice for legs, 2 red candies for eyes and marshmallow cones for fangs.

Thursday, October 27, 2011

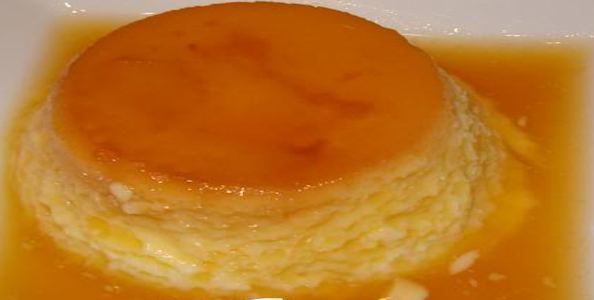
Coconut Creme Caramel

One of my favorite fruits is Coconut. Yes, it's a fruit (not a nut, so not considered to be an allergen) with many beneficial properties. Coconut water is a very potent electrolytic drink used by many athletes pre and post-workout without the sugar and chemicals as in other sports drinks. Coconut oil is used for cooking as it is trans-fat free, and also as a moisturizer (I strictly use coconut oil on my body). Then there's coconut milk and meat (the white fleshy part) that is used in baking. Coconut creme caramel (or Flan de Coco) is a typical South American dessert where coconuts are found in abundance.

Ingredients

1 can (400 ml) coconut milk
1/3 cup milk
1 cup grated fresh coconut
1/3 cup granulated sugar
3 egg yolks
1/2 cup water
1/2 cup granulated sugar

6 ramekins (1/2 cup capacity)
9 x 13" pan
Pot of boiling water

Combine coconut milk and milk and bring to a boil in a small saucepan. remove from heat. Whisk together eggs and 1/3 cup sugar. Slowly add a small amount of milk mixture to egg mixture and whisk briefly. Pour remaining egg mixture into pot and gently cook on medium heat for 5 minutes. Remove from heat. This is known as "custard".

Combine water and 1/2 cup sugar in small pot and boil without stirring for 5-10 minutes, until syrup becomes golden brown. This becomes "caramel". Remove from heat. Place ramekins in pan and distribute caramel evenly in ramekins. Pour coconut custard overtop the caramel. Pour boiling water in pan along the side so that it does not get in custard. Bake at 350 F for 30 minutes until set but still jiggly. Allow to completely cool in pan before placing custards in refrigerator over night. To serve, run a butter knife around edge of ramekins and invert over plate. Caramel will drizzle over top. Buenapetito!

Monday, September 5, 2011

Back to school nut-free snacks!

I'm back...1 year later! It's been a very busy year and I apologize but I promise to keep this updated and provide you with many delicious recipes and creative fun ideas!! Now that the kiddies are back to school and routine, I thought I'd share a very quick and easy healthy snack that you can add to their lunches:


Agave Oatmeal Bars

1 cup raisins or other dried fruit (cranberries, currants etc)
1/2 cup chia seeds
1 cup water
1/2 cup agave nectar

1 tsp. vanilla
2 eggs, separated
2 cups rolled oats
1 1/2 cups unbleached flour
1/2 cup butter
1/2 tsp. baking soda


Cream agave and butter together. Add 2 egg yolks, vanilla and water; mix thoroughly. Add flour, baking soda, raisins, chia seeds and rolled oats. Beat egg whites until stiff and fold into the batter. Pour into 9 x 13 inch buttered baking pan. Bake at 350 degrees for 30 to 40 minutes. Cool and cut into squares.

Tuesday, June 8, 2010

Happy Graduation, The Finale!

I am very proud to announce that I've completed my first round of teaching all of Wilton's Courses 1-4! I am grateful to my students who have continued on with me from the beginning. Here are their final cakes! Now the world's their oyster....who knows if one of them will become the future Bonnie Gordon??


Thursday, February 25, 2010

Happy Graduation!

After 4 weeks of teaching my first Wilton Cake Decorating course, my students have graduated with beautiful cakes topped with roses, bows and shell borders! Some of their pics are located on the slide show.
I look forward to teaching them again in Course 2!


Thursday, January 28, 2010

Wilton Cake Decorating Classes at Michael's!


I'm so excited to announce that I will teaching Wilton Cake Decorating classes at Michael's in Richmond Hill starting in  February. Details are as follows:

Course 1- Wednesday February 3, 10, 17 and 24 from 6:30-8:30 pm

Location- Michael's Arts & Crafts
                2-20 John Birchall Rd

                Richmond Hill (at Elgin Mills/ Leslie)

Cost- $22.50/ 4 weeks (50% off regular price) plus cost of supplies

I'll also be teaching Course 1 in March on Sunday afternoons. Details to follow! Course 2 will continue on Wednesday evenings, followed by Course 3 and 4. For more details, visit http://www.wilton.com/classes/local_classes.cfm

Wednesday, October 21, 2009

Recipe of the week: Chocolate Lava Cakes


ATTENTION CHOCOHOLICS! This recipe is a MUST HAVE!!!

Melt-in-your mouth lava cakes look like little chocolate cupcakes but when you cut in the middle, a gooey surprise awaits! Top with a dollop of whipped cream or vanilla ice cream and chocolate sauce. Make sure to use a good quality chocolate such as Green & Blacks or Michel Cluizel for extra richness.


Ingredients:
1/4 cup unsalted butter
8 oz semi-sweet chocolate, broken into pieces
4 eggs
4 egg yolks
3/4 cups sugar
2 tsp vanilla extract
2/3 cups all purpose flour

Preheat oven to 400 F. Line 12 muffin cups with paper cups (they will be removed later). Melt butter and chocolate over low heat or in double boiler. Beat eggs and egg yolks with sugar until light and fluffy, about 3-5 minutes. Add chocolate mixture and vanilla and mix until well incorporated. Add flour by hand until just combined. Divide in prepared muffin tin (they will very full, but not too worry because they won't rise).
Bake for 10 minutes, not one minute longer or you will not get the gooey center. Remove from oven muffin tin and serve immediately (don't forget to remove the paper cup!). Dust with icing sugar and top with ice cream. YUMMMMMMMY!


Thursday, September 17, 2009

Doll Cakes

Doll or Barbie cakes are by far the most popular type of cakes for little princesses! They are so much fun to make as the "dress" (or cake) can be decorated many ways. To make a doll cake, you have to start with an inverted cake, or cake baked in a bowl. Once cooled, you can cut in layers as you would with a standard cake to create height. Frost as normal and decorate with coloured buttercream or fondant.


This Barbie cake was created for my friend's bridal shower. Both the "dress" and base are made of cake and would serve around 100 people. Fondant was used to create flow and dimension. The pattern on the base was created with a patterned matt (available at cake decorating stores) and the pearls on the dress were pastel dragees.


The Tinkerbell cake on the left is a smaller doll cake I made for a 6 year old's birthday. It was frosted with pastel pink and lavender buttercream. Doll picks are available at Bulk Barn to create a simple doll cake and come in blond, brunette, light and dark-skinned. If using a real Barbie, remove the bottom clothing and wrap the legs with saran wrap before inserting in the cake so that it won't get smeared with cake and icing.

The last picture is a castle cake in which both the castle and base are cake while the doll figurines sit on top.

Saturday, September 12, 2009

Recipe of the week: Classic Tiramisu

Tira-mi-su in in Italian means "pick me up"- the strong espresso and rich mascarpone cheese adds real punch to this classic Italian cake. I hate it when people substitute the mascarpone for cream cheese or whipping cream- then it becomes an ordinary trifle! Tiramisu is delicious year-round. Some people make it in a pan since the cream is too runny to stand on it's own, but this recipe makes a mousse-like cream that you don't need a pan for!


2 pkgs Savoiardi cookies (Italian ladyfingers)
1 cup brewed espresso coffee, cooled to room temperature
1/2 cup Marsala wine
2 tbsp granulated sugar
4 eggs (room temperature), divided
4 tbsp granulated sugar
1 container Mascarpone cheese, room temperature (I prefer Galbani)
Cocoa powder for dusting
1 inch ribbon, for decoration

Prepare cake on a rectangular cake board (about 12" x 18"). Combine espresso, Marsala and 2 tbsp sugar in a shallow bowl. Set aside. Beat 4 eggs yolks with 4 tbsp sugar until light and fluffy. Add mascarpone cheese with a paddle attachment or by hand until well incorporated. Do not beat or mixture will curdle. Beat egg whites until stiff peaks form. Gently fold egg whites in mascarpone mixture.  Dip cookies, one by one, on both sides in espresso mixture, placing side-by-side on board. Do not soak or cake will be mushy. Make sure to leave 2" on all four sides. Once one layer is made, pour 1/3 of mascarpone mixture on cookies and spread evenly. Dust with cocoa powder. Repeat with cookies and cheese mixture 2 more times for a 3-layered cake. Cover completely with cocoa powder. Cut remaining cookies in half and press along sides of cake to form a "gate". Add ribbon around cookies for a elegant presentation!

Tuesday, September 1, 2009

Cookie and Chocolate Favors

I come from a traditional Italian family, where bomboniere, or favors are a ritual for weddings, showers and christenings. They're usually something for the kitchen or a little something that will never be used (and can sometimes be found at the Dollar Store!).
Instead of giving something that will collect dust or be thrown out, why not give a treat that will taste as good as it looks? Here are some pics of my cookie and truffle favors. They are customizable to theme, colour, and flavour and make a real statement to your next event!


This picture is an example of cookie favors for a baby shower. They can be wrapped individually in cellophane and tied with a satin ribbon. The cookies themselves are sugar cookies with fondant and royal icing.
These miniature wedding cakes are actually truffles! You can have them in white, milk or dark chocolate and fit perfectly in one of these boxes:

Wednesday, August 26, 2009

Recipe of the week: Oreo Cheesecake

Cheesecake is by far my favorite type of cake. You can play around with flavours, add cookies, nuts or chocolate to the batter and change up the crust to serve all year round. But, how many times have you made a cheesecake that was hard and dense, with large cracks on top that you wondered how to cover them up? Well, after 20 years of baking, I finally found the secret to making a cheesecake that was so silky, smooth and crack-free that it resembled cutting through soft butter: a bain-marie! For the novice bakers, a bain-marie is the French term for a water-bath. This method is commonly used to make custards, souffles and creme caramel (or flan), so I adopted it to my cheesecake and voila! True indulgence! Do not, and I repeat, do not use light cream cheese as you will not get the true silkiness or flavour needed. Instead, just eat a sliver, or burn the extra calories washing the dishes that your guests will use once they polish off their plates!
Picture courtesy of kraftfoods.com

Oreo New York-style Cheesecake
Crust:
1 1/4 cups Oreo crumbs
1/4 cup melted butter

Batter:
4 pkgs Philadelphia regular cream cheese, at room temperature
3/4 cup granulated sugar
4 eggs, room temperature
1 cup regular sour cream                                         
2 tsp. vanilla extract
10 oreo cookies, broken in large pieces

Preheat oven to 350 F. For crust, combine crumbs with butter until combined. Press along bottom and up sides of springform pan. Do not bake. Cover bottom of pan with aluminum foil and set aside.
Boil a large pot of water (or a tea kettle) while preparing the batter. Beat cream cheese with flat beater (do not overmix). Add sugar and mix until fluffy. Beat in eggs one at a time until well incorporated. Add sour cream, vanilla and oreos until just combined. Pour into prepared crust and put pan in a larger casserole or roasting pan. Pour water in this pan until halfway up sides of springform pan. Bake for 1 hour or until just set (middle of the cake will still jiggle when shaken). Allow to cool on baking rack to room temperature before refrigerating. Top with more Oreos!

Monday, August 24, 2009

Massimo's Birthday Cake


Which 5 year old boy doesn't like Spiderman? For my son Massimo's 5th Birthday, I made him a 3D Spiderman cake! The head was made of Rice Krispies and the whole cake was covered in red fondant. The white and blue were also fondant while the black webs were made of royal icing tinted black. When making dark coloured fondant or icing, you'll need to use quite a bit of paste colour and need a lot of muscle to work it through. One tip: use the dough hook on your mixer to do the work for you!

Wednesday, August 19, 2009

Recipe of the week: Vegan Vanilla Cupcakes


This recipe is great for all who are lactose-intolerant and allergic to eggs:


1 cup soy milk
1 tsp. apple cider vinegar
1 1/4 tsp all purpose flour
2 tbsp. cornstarch
3/4 tsp. baking powder
1/2 tsp. baking soda
1/2 tsp. salt
1/3 cup canola oil
3/4 cup granulated sugar
2 1/2 tsp. vanilla extract

Preheat oven to 350 F. Combine soy milk and vinegar. Let stand a few minutes until curdled. Sift flour, cornstarch, baking powder, baking soda and salt into a large bowl. Beat together soy mixture, oil, sugar and vanilla in another bowl. Add dry ingredients to wet. Spoon into cupcake liners. Bake for 20-22 minutes or until toothpick inserted in centre is dry.

Vegan Vanilla Frosting:
1 cup unsalted margarine
2 cups sifted icing sugar
1/4 cup soy milk
1 tsp. vanilla extract

Beat all ingredients until smooth and lump free. Pipe or spread on cooled cupcakes. Can be coloured with Wilton gel colours (available at Bulk Barn).